使用vue3+ts改造一个canvas动态星空背景
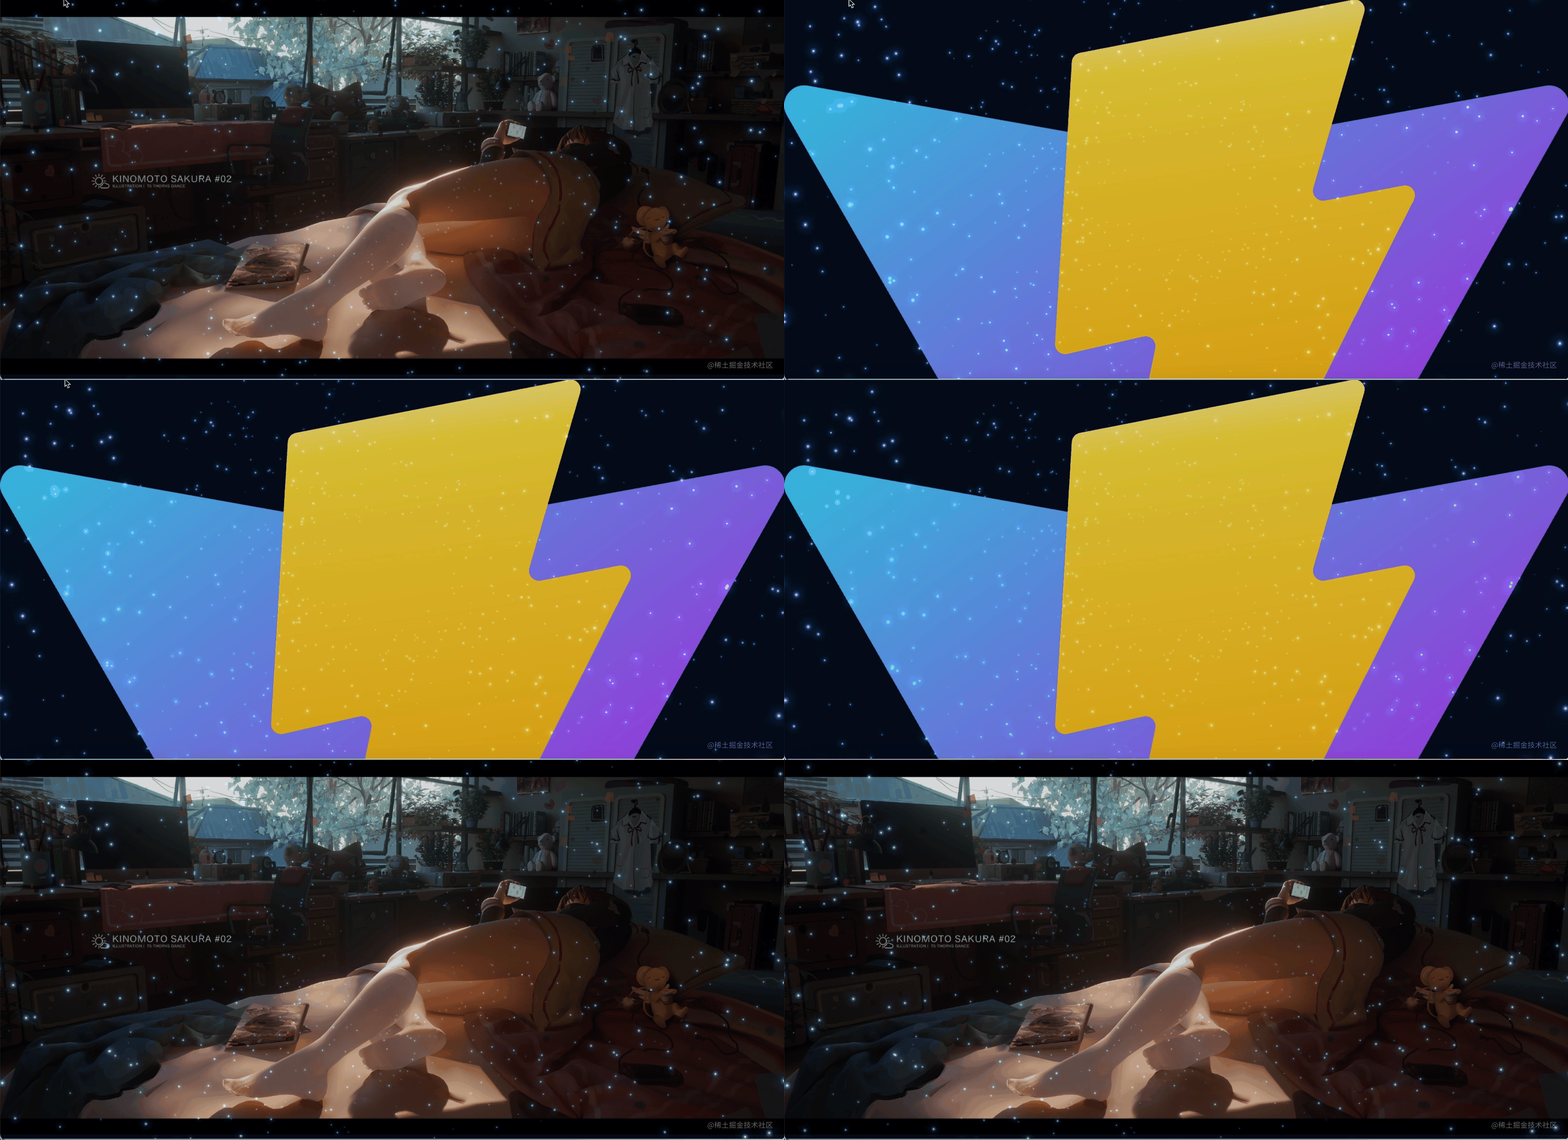
在线预览 cbtpro.github.io/vue-star-bg 完整的项目代码 github.com/cbtpro/vue-…
下面是一个可运行的canvas动态星空的html文件,可以直接通过
npx vite --port=4001启动容器,然后访问http://127.0.0.1:4001/star.html 访问
文件 star.html
1
2
3
4
5
6
7
8
9
10
11
12
13
14
15
16
17
18
19
20
21
22
23
24
25
26
27
28
29
30
31
32
33
34
35
36
37
38
39
40
41
42
43
44
45
46
47
48
49
50
51
52
53
54
55
56
57
58
59
60
61
62
63
64
65
66
67
68
69
70
71
72
73
74
75
76
77
78
79
80
81
82
83
84
85
86
87
88
89
90
91
92
93
94
95
96
97
98
99
100
101
102
103
104
105
106
107
108
109
110
111
112
113
114
115
116
117
118
119
120
121
122
123
124
125
126
127
128
129
130
131
132
133
134
135
136
137
138
139
140
141
142
143
144
145
146
147
148
149
<html lang="zh-CN">

<head>
  <meta charset="utf-8">
  <meta name="viewport" content="width=device-width,initial-scale=1">
  <title>星星背景</title>
</head>

<body>
  <style>
    * {
      margin: 0;
    }

    .star-bg-canvas {
      width: 400px;
      height: 400px;
    }
  </style>
  <div class="container">
    <canvas id="star-bg-canvas"></canvas>
  </div>
  <script>
    function resizeCanvas() {
      const canvas = document.getElementById('star-bg-canvas'),
        ctx = canvas.getContext('2d'),
        w = (canvas.width = window.innerWidth),
        h = (canvas.height = window.innerHeight),
        hue = 217,
        stars = [],
        maxStars = 1200;
      let count = 0;
      const img = new Image();
      img.src =
        'https://blog.chenbitao.com/vue3-in-action/assets/T5.03361c86.jpg';

      const canvas2 = document.createElement('canvas'),
        ctx2 = canvas2.getContext('2d');
      canvas2.width = 100;
      canvas2.height = 100;
      const half = canvas2.width / 2,
        gradient2 = ctx2.createRadialGradient(
          half,
          half,
          0,
          half,
          half,
          half
        );
      gradient2.addColorStop(0.025, '#fff');
      gradient2.addColorStop(0.1, 'hsl(' + hue + ', 61%, 33%)');
      gradient2.addColorStop(0.25, 'hsl(' + hue + ', 64%, 6%)');
      gradient2.addColorStop(1, 'transparent');

      ctx2.fillStyle = gradient2;
      ctx2.beginPath();
      ctx2.arc(half, half, half, 0, Math.PI * 2);
      ctx2.fill();
      function random(min, max) {
        if (arguments.length < 2) {
          max = min;
          min = 0;
        }

        if (min > max) {
          const hold = max;
          max = min;
          min = hold;
        }

        return Math.floor(Math.random() * (max - min + 1)) + min;
      }

      function maxOrbit(x, y) {
        const max = Math.max(x, y),
          diameter = Math.round(Math.sqrt(max * max + max * max));
        return diameter / 2;
      }

      const Star = function () {
        this.orbitRadius = random(maxOrbit(w, h));
        this.radius = random(60, this.orbitRadius) / 12;
        this.orbitX = w / 2;
        this.orbitY = h / 2;
        this.timePassed = random(0, maxStars);
        this.speed = random(this.orbitRadius) / 900000;
        this.alpha = random(2, 10) / 10;

        count++;
        stars[count] = this;
      };

      Star.prototype.draw = function () {
        const x = Math.sin(this.timePassed) * this.orbitRadius + this.orbitX,
          y = Math.cos(this.timePassed) * this.orbitRadius + this.orbitY,
          twinkle = random(10);

        if (twinkle === 1 && this.alpha > 0) {
          this.alpha -= 0.05;
        } else if (twinkle === 2 && this.alpha < 1) {
          this.alpha += 0.05;
        }

        ctx.globalAlpha = this.alpha;
        ctx.drawImage(
          canvas2,
          x - this.radius / 2,
          y - this.radius / 2,
          this.radius,
          this.radius
        );
        this.timePassed += this.speed;
      };

      for (let i = 0; i < maxStars; i++) {
        new Star();
      }

      function animation() {
        ctx.globalCompositeOperation = 'source-over';
        ctx.globalAlpha = 0.8;
        ctx.fillStyle = 'hsla(' + hue + ', 64%, 6%, 1)';
        ctx.fillRect(0, 0, w, h);

        ctx.drawImage(img, 0, 0);
        ctx.globalCompositeOperation = 'lighter';
        for (let i = 1, l = stars.length; i < l; i++) {
          stars[i].draw();
        }

        window.requestAnimationFrame(animation);
      }

      animation();
    }

    if (document.getElementById('star-bg-canvas').getContext) {
      resizeCanvas();
    }

    window.onresize = function () {
      if (document.getElementById('star-bg-canvas').getContext) {
        resizeCanvas();
      }
    };
  </script>
</body>

</html>
要把它移植到vue3项目中,如果直接拷贝进vue文件里,实在是不优雅,需要根据vue3的特性,将代码修改成响应式的。
首先创建一个项目
1
2
3
4
使用vue-ts模板创建名字为vue-star-gb的项目
npm create vite@latest vue-star-bg -- --template vue-ts
# 切换项目路径并使用vscode打开项目,同时安装依赖,完成后启动项目
cd vue-star-bg && code . && npm i && npm run start
拆分出工具类
原来的随机数修改成获取安全随机数,这里不使用用export default是因为实际开发过程中,工具类会越来越大,如果使用默认导出不利于treeshake。
如果你确认这个文件始终只会有一个导出,那么就可以使用默认导出。
1
2
3
4
5
6
7
8
9
10
11
12
13
14
15
16
17
18
19
20
21
22
23
24
25
26
/**
 * 生成范围内的随机数
 * @param min 最小值
 * @param max 最大值
 * @param isFloat 是否包含小数点
 * @returns number
 */
export const random = (min = 0, max = 100, isFloat = false) => {
  const array = new Uint32Array(1);
  const maxUint = 0xffffffff;
  const randomNumber = crypto.getRandomValues(array)[0] / maxUint;
  const randomRangeValue = (max - min + 1) * randomNumber + min;
  return isFloat ? randomRangeValue : Math.floor(randomRangeValue);
};

/**
 * 计算最大运行轨道
 * @param x 轨道坐标x
 * @param y 轨道坐标y
 * @returns 最大的运行轨道坐标
 */
export const maxOrbit = (x: number, y: number) => {
  const max = Math.max(x, y);
  const diameter = Math.round(Math.sqrt(max * max + max * max));
  return diameter / 2;
};
拆分出star组件
src/components/star/Star.ts
将星星对象单独拆分出一个ts文件,这里注意,因为interface IStarOptions {}只在class Star {}的构造函数中使用了,如果在外部使用了1、2次,定义在Star.ts中完全没有问题,其他地方要使用,直接导入就可以使用了。
如果是用得非常多的,比如请求返回体封装IResponseBody<T>,这种使用频率超高的类型,应该单独定义在d.ts文件中,并通过tsconfig.json配置路径。
1
2
3
4
5
6
7
8
9
10
11
12
13
14
15
16
17
18
19
20
21
22
23
24
25
26
27
28
29
30
31
32
33
34
35
36
37
38
39
40
41
42
43
44
45
46
47
48
49
50
51
52
53
54
55
56
57
58
59
60
61
62
// src/components/star/Star.ts
import { maxOrbit, random } from '@/utils';

/**
 * 星星的构造函数参数
 */
export interface IStarOptions {
  /** 画布尺寸宽度 */
  w: number;
  /** 画布尺寸高度 */
  h: number;
  /** 星星数量  */
  maxStars: number;
}
export default class Star {
  /** 运行的最大轨道 */
  orbitRadius: number;
  /** 半径 */
  radius: number;
  /** 运动轨道坐标x */
  orbitX: number;
  /** 运动轨道坐标y */
  orbitY: number;
  /** 事件流逝速度 */
  timePassed: number;
  /** 运动速度 */
  speed: number;
  /** 透明度 */
  alpha: number;
  constructor(options: IStarOptions) {
    const { w, h, maxStars } = options;
    this.orbitRadius = random(maxOrbit(w, h));
    this.radius = random(60, this.orbitRadius) / 12;
    this.orbitX = w / 2;
    this.orbitY = h / 2;
    this.timePassed = random(0, maxStars);
    this.speed = random(this.orbitRadius) / 900000;
    this.alpha = random(2, 10) / 1;
  }
  draw(ctx: CanvasRenderingContext2D, canvas: HTMLCanvasElement) {
    const x = Math.sin(this.timePassed) * this.orbitRadius + this.orbitX;
    const y = Math.cos(this.timePassed) * this.orbitRadius + this.orbitY;
    // 闪烁频率
    const twinkle = random(10);

    if (twinkle === 1 && this.alpha > 0) {
      this.alpha -= 0.05;
    } else if (twinkle === 2 && this.alpha < 1) {
      this.alpha += 0.05;
    }

    ctx.globalAlpha = this.alpha;
    ctx.drawImage(
      canvas,
      x - this.radius / 2,
      y - this.radius / 2,
      this.radius,
      this.radius
    );
    this.timePassed += this.speed;
  }
}
单独拆解出来,会发现参数maxStars其实还可以解耦,它的意思是当前存在多少个星星,在执行new Star()的时候,将随机生成timePassed传入构造函数中,就可以将maxStars解耦。
src/components/star/index.vue
这里着重要介绍下改动比较大的点:用ref替代选择器document.getElementById。 ref是vue一个非常强大的功能,ref 被用来给元素或子组件注册引用信息,它在vue2版本就已经存在很久了,我理解它的作用就是删除jquery选择器,消除选择器带来的性能问题,并且对ts非常非常友好。
同时使用onMounted,onBeforeUnmount注册事件和销毁事件。虽然vue已经帮忙做了很多性能优化,并且浏览器在切换、退出的时候也能够对requestAnimationFrame进行优化,但是养成良好的编程系统,在组件销毁时要消除副作用。这是必须的。
1
2
3
4
5
6
7
8
9
10
11
12
13
14
15
16
17
18
19
20
21
22
23
24
25
26
27
28
29
30
31
32
33
34
35
36
37
38
39
40
41
42
43
44
45
46
47
48
49
50
51
52
53
54
55
56
57
58
59
60
61
62
63
64
65
66
67
68
69
70
71
72
73
74
75
76
77
78
79
80
81
82
83
84
85
86
87
88
89
90
91
92
93
94
95
96
97
98
99
100
101
102
103
104
105
106
107
108
109
110
111
112
113
114
115
116
117
118
119
120
121
122
123
// src/components/star/index.vue
<script setup lang="ts">
import { onMounted, onBeforeUnmount, ref, toRef } from 'vue';
import { useImageLoader } from '@/hooks/image';
import Star from './Star';

/**
 * 星星组件的props
 */
export interface IStarProps {
  /** 画布背景图片 */
  imageUrl: string;
  /** 生成多少个星星 */
  maxStars?: number;
}

const props = withDefaults(defineProps<IStarProps>(), {
  maxStars: 1200
});

const canvasRef = ref<HTMLCanvasElement>();

let id: number | undefined = undefined;

const imageUrl = toRef(props, 'imageUrl');
const { image } = useImageLoader(imageUrl);

function resizeCanvas() {
  const canvas = canvasRef.value;
  if (!canvas) {
    throw new Error('canvas元素不能为空');
  }
  const ctx = canvas.getContext('2d');
  if (!ctx) {
    throw new Error('canvas元素不能为空');
  }
  const w = (canvas.width = window.innerWidth);
  const h = (canvas.height = window.innerHeight);
  const hue = 217;
  // 创建存储星星的容器
  const stars = ref<Star[]>([]);
  const maxStars = props.maxStars;
  const count = ref(0);

  const canvas2 = document.createElement('canvas');
  const ctx2 = canvas2.getContext('2d');
  if (!ctx2) {
    throw new Error('canvas获取context失败!');
  }
  canvas2.width = 100;
  canvas2.height = 100;
  const half = canvas2.width / 2;
  const gradient2 = ctx2.createRadialGradient(half, half, 0, half, half, half);
  gradient2.addColorStop(0.025, '#fff');
  gradient2.addColorStop(0.1, 'hsl(' + hue + ', 61%, 33%)');
  gradient2.addColorStop(0.25, 'hsl(' + hue + ', 64%, 6%)');
  gradient2.addColorStop(1, 'transparent');

  ctx2.fillStyle = gradient2;
  ctx2.beginPath();
  ctx2.arc(half, half, half, 0, Math.PI * 2);
  ctx2.fill();

  for (let i = 0; i < maxStars; i++) {
    const option = {
      w,
      h,
      maxStars
    };
    const star = new Star(option);
    stars.value.push(star);
    count.value++;
  }

  const animation = () => {
    ctx.globalCompositeOperation = 'source-over';
    ctx.globalAlpha = 0.8;
    ctx.fillStyle = 'hsla(' + hue + ', 64%, 6%, 1)';
    // 清除画布
    ctx.fillRect(0, 0, w, h);
    if (image.value) {
      const { width, height } = image.value;
      // 绘制背景图片
      ctx.drawImage(image.value, 0, 0, w, (height * w) / width);
    }

    // 绘制星星
    ctx.globalCompositeOperation = 'lighter';
    for (let i = 1, l = stars.value.length; i < l; i++) {
      stars.value[i].draw(ctx, canvas2);
    }

    // 将动画放入动画帧中,提升性能
    id = window.requestAnimationFrame(animation);
  };

  animation();
}

onMounted(() => {
  resizeCanvas();
  window.addEventListener('resize', resizeCanvas);
});
onBeforeUnmount(() => {
  if (id) {
    window.cancelAnimationFrame(id);
  }
  window.removeEventListener('resize', resizeCanvas);
});
</script>

<template>
  <div class="container">
    <canvas ref="canvasRef" class="star-bg-canvas"></canvas>
  </div>
</template>

<style scoped>
.container {
  width: 100vw;
  height: 100vh;
}
</style>
加载图片
你可能注意到了,我将imageUrl和maxStars提取到props里,特别是imageUrl。 我将imageUrl设计成可以动态更改、并影响星空的背景绘制。
这里充分的使用了hook和响应式的特点。重新设计了一个组合式APIuseImageLoader。
它需要传入一个响应式的url地址,并返回一个响应式的HTMLImageElement对象。 通过watch监听url,如果url地址发生变化,则会重新加载新的HTMLImageElement对象。 使用者再次使用获取的image,就会使用新的HTMLImageElement对象。 获取url图片失败,则不会修改image.
实现方法有很多种,这只是一种数据流的模式,建议体会可以在某些场景替代掉事件驱动。 比如搜索框发生变化,则重新拉取数据。
1
2
3
4
5
6
7
8
9
10
11
12
13
14
15
16
17
18
19
20
21
22
23
24
25
26
27
28
29
30
31
32
33
34
35
36
37
38
39
40
41
42
43
44
45
46
47
48
49
50
51
52
53
54
55
56
import { ref, Ref, watch } from 'vue';

/**
 * 图片加载工具hook,传入一个响应式的图片地址,返回一个响应式的HTMLImageElement
 * @param imageUrl 图片地址
 * @returns {
*  image: ref<HTMLImageElement>
* }
*/
export const useImageLoader = (imageUrl: Ref<string>) => {

  const image = ref<HTMLImageElement>();
  /**
   * 加载图片
   * @param imgSrc 图片地址
   * @returns HTMLImageElement
   */
  const loadImagePromise = (url: string) => {
    return new Promise<HTMLImageElement>((resolve, reject) => {
      const img = new Image();
      img.src = url;
      img.onload = () => {
        resolve(img);
      };
      img.onerror = (err) => {
        reject(err);
      };
    });
  };
  const load = (url: string) => {
    loadImagePromise(url).then((img) => {
      image.value = img;
    }).catch(err => {
      console.error(err);
    });;
  };

  /**
   * 监听当图片地址改变时,重新加载图片
   */
  watch(imageUrl, (value, oldValue) => {
    if (value !== oldValue) {
      load(value);
    }
  });

  /**
   * 加载图片
   */
  load(imageUrl.value);

  return {
    /** 响应式的图片对象 */
    image,
  };
};
以上就是主要的重构思路,仍然还有很大的重构空间,感谢你看到这里,如果你有什么想法,可以在下面留下你的想法,互相学习!